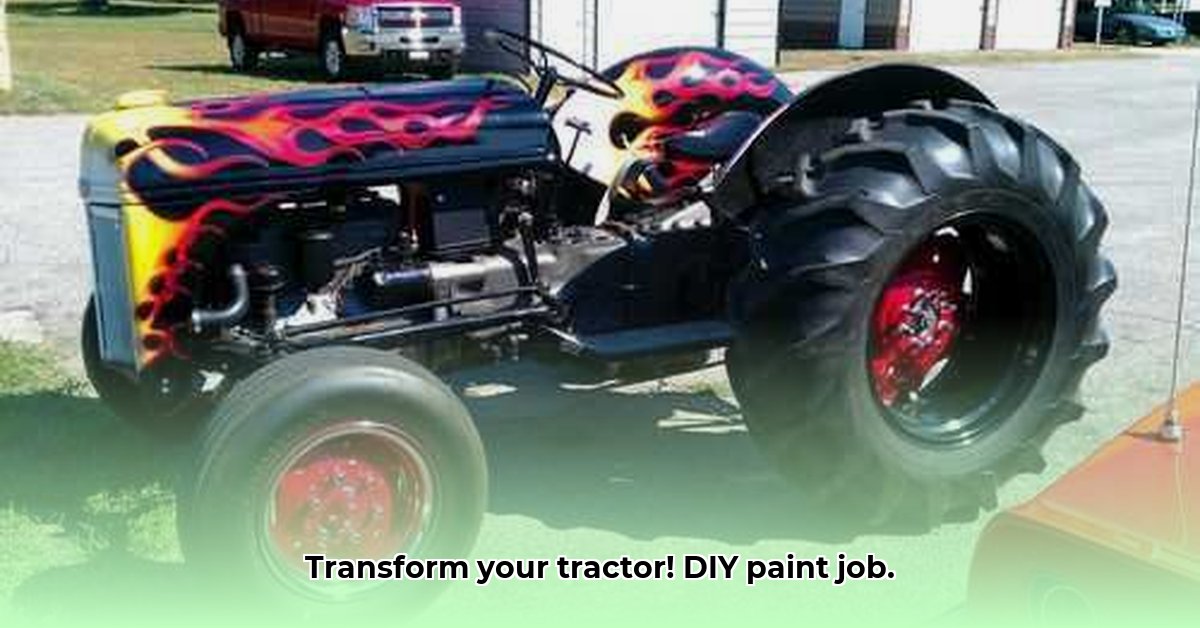
Giving your trusty tractor a fresh coat of paint isn't just about aesthetics; it's a smart way to protect your investment and boost its value. This comprehensive guide will walk you through the entire process, from prep work to the final gleaming coat, ensuring a professional-looking result, no matter your DIY skill level. For more detailed instructions, see our tractor painting guide.
Prepping Your Tractor for a Perfect Paint Job
Before you even think about paint, meticulous preparation is key. A well-prepped surface is the foundation of a long-lasting, beautiful finish. Think of it like preparing a canvas for a masterpiece – you wouldn't start without cleaning it, would you?
1. Cleaning: Begin with a thorough cleaning. A pressure washer (around 2600 PSI is ideal) will blast away loose dirt, mud, and debris. For stubborn grime, a quality degreaser (like Purple Power or Dupont 3812) will cut through grease and oil, ensuring optimal paint adhesion. Allow the degreaser to dwell as per the manufacturer’s instructions. Remember to exercise caution near electrical components.
2. Rust Removal: Address rust diligently. For small areas, a robust wire brush works well. For more extensive rust damage, a chemical rust remover like Marhyde is a valuable tool. Always follow the manufacturer's instructions carefully, prioritizing safety. After rust removal, thoroughly sand the area with progressively finer grits of sandpaper (starting around 80 grit and finishing with 400 grit at least) to create a perfectly smooth foundation for the primer.
3. Sanding: Sanding, even on rust-free areas, is crucial. Starting with a coarser grit (around 80 grit) to remove any remaining paint and level out imperfections, gradually move to finer grits (180, then 400, and even finer if necessary) for a flawless, even surface. Sanding in one direction helps avoid swirl marks.
4. Priming: Before painting, apply a high-quality automotive primer, such as Dupli-Color. This promotes superior paint adhesion and helps prevent future rust. Apply a thin, even coat and allow ample drying time as per the manufacturer's instructions. An epoxy primer offers superior adhesion and durability compared to cheaper alternatives.
Choosing the Right Paint: A Comparison
Selecting the appropriate paint is just as crucial as the preparation. The choice significantly influences the final look, durability, and longevity of your tractor's paint job. Different paints offer unique advantages and disadvantages, impacting both the final aesthetic and the long-term protection of your tractor. Let's break down the options:
| Paint Type | Pros | Cons | Cost |
|---|---|---|---|
| Acrylic Enamel | Easy application, relatively durable, various climates | Less durable than urethane, potential for fading | Moderate |
| Urethane | Superior durability, excellent gloss, chip resistance | More demanding application, requires special thinner, high cost | High |
| Oil-Based | Very durable, excellent UV resistance | Long drying time, strong odor, potentially less environmentally friendly | Moderate |
Consider your climate, the type of work your tractor performs, and your budget when making your decision. Acrylic enamel provides a good balance of ease of use and durability for many applications. Urethane offers superior long-term protection but demands more skill in application and is more pricey. Oil-based paints offer robust protection but are less popular due to their odor and extended drying times. Direct-to-metal (DTM) paints eliminate the need for a primer but often require more meticulous surface preparation.
Painting Your Tractor: Step-by-Step Instructions
With preparation complete, it’s time for the application phase. Remember, multiple thin coats are far superior to one thick coat to prevent drips, runs, and an uneven finish. Patience is key here!
1. Masking: Carefully mask off any areas you don't want painted, using high-quality painter's tape and masking paper. Take your time; a well-masked surface ensures clean lines and reduces cleanup later.
2. First Coat: Apply your initial coat thinly and evenly. The aim here is to create a base layer, not full coverage. Allow for thorough drying according to the manufacturer's instructions.
3. Subsequent Coats: Once the first coat is dry, apply subsequent thin coats, allowing each to dry completely before proceeding. Two to three coats are usually sufficient for complete coverage, depending on the paint's opacity.
4. Drying Time: Adequate drying time is critical between coats and after the final coat. Rushing this phase can lead to imperfections and compromise the longevity of the paint job. Allow several days for complete curing, especially with oil-based paints.
5. Clear Coat (Optional): A clear coat adds superior protection against UV damage, scratches, and weathering, maintaining your tractor's beautiful finish for many years.
Cleanup and Responsible Disposal
After painting, thoroughly clean your equipment using the appropriate solvents recommended for your paint type. Dispose of all waste, including paint and solvents, responsibly, according to your local environmental regulations.
Your Repainted Tractor: A Stunning Transformation
With careful preparation, smart paint selection, and diligent application, you'll achieve a magnificent, freshly painted tractor. The sense of accomplishment is rewarding, and your tractor will look better than ever! Remember, a stunning finish is a result of careful attention to detail at every stage.